Tile Measuring Mistakes: 7 Errors That Waste Tile and Ruin Layouts
Quick answer: The biggest tile measuring mistakes happen before mortar is mixed: measuring only one wall, assuming the room is square, buying from square footage alone, ignoring grout joints and tile-size variation, skipping a dry layout, forgetting openings and transitions, and ordering without considering the actual pattern and cuts.
The safest workflow is measure the surface → map irregularities → choose the tile and joint → dry-lay the pattern → calculate boxes from the exact product coverage → add project-specific overage. There is no universal waste percentage that works for every room or pattern.
| Measuring Error | Better Move |
|---|---|
| Measuring one wall once | Measure multiple points and record the shortest/longest dimensions |
| Assuming corners are square | Check diagonals or use a 3-4-5 layout check |
| Buying from room square footage alone | Use box coverage plus the actual layout, cuts, breakage risk and spare-tile plan |
| Using a fixed grout width | Follow the tile and grout manufacturer plus current ANSI/TCNA guidance |
| Skipping a dry layout | Test full courses before setting tile |
| Ignoring thresholds and fixtures | Map every interruption before ordering |
| Starting from the first wall | Build reference lines around the finished visual layout |
Use the Tile Calculator to estimate area, tile quantity, boxes, grout and the material costs you enter. Then use the Tile Layout Patterns planner before deciding how much extra tile the project actually needs.

Mistake #1: Measuring the Room Only Once
Walls and floors are rarely perfectly straight. A room that measures 10 feet across at one end may be slightly wider or narrower at the other.
For floors, measure the room in more than one place. For walls, measure width and height at several points. Record the differences rather than averaging them away.
If the room is irregular, divide the surface into rectangles or other simple shapes, calculate each area, then add them together. Keep doorways, niches, cabinets, islands, fireplaces, and other interruptions on the sketch.
Use diagonals to check square
For a rectangular area, compare corner-to-corner diagonal measurements. Large differences tell you the room is out of square and the tile layout will need adjustment.
You can also use the 3-4-5 method to establish a right angle: mark 3 units on one reference line and 4 units on the perpendicular direction; the diagonal between those points should be 5 units when the angle is square. Scale the numbers up for a longer reference if needed.
Mistake #2: Ordering From Square Footage Alone
Surface area is only the starting number. The actual order depends on:
- tile dimensions
- box coverage
- room shape
- pattern and orientation
- edge cuts
- openings and transitions
- breakage risk
- shade/lot continuity
- whether you want spare tile for future repairs
A straight layout in a simple rectangle may need less extra material than a diagonal, herringbone, border-heavy, or irregular-room layout. Large-format tile can also create substantial cut waste when the room dimensions do not work cleanly with the module.
Do not use a fixed 10%, 15%, 20% or 25% rule as a substitute for layout planning. Dry-lay or model the pattern first, then use the calculator and round up to full boxes.
If the product has strong shade or caliber variation between production lots, ordering enough from one lot can matter. Keep the box labels until the project is complete.
Mistake #3: Treating Grout Joints as an Afterthought
Grout joints change the module. A row is not simply “tile width × number of tiles.” It is tile dimensions plus the planned joints between them.
The 2026 TCNA Handbook includes current guidance on grout-joint sizes, patterns, substrate flatness and workmanship standards. TCNA also notes that ANSI installation standards tie joint size to the actual dimensional variation in the tile. See the 2026 TCNA Handbook overview.
A long-standing ANSI principle is that the actual grout joint should be wide enough to accommodate the size variation of the supplied tile; TCNA has explained that narrow joints are especially dependent on consistent tile dimensions. See TCNA’s grout-joint discussion.
Use the joint recommendation for the exact tile and grout product rather than assuming every small tile gets 1/16 inch or every large tile gets 1/8 inch.
Mistake #4: Starting Installation Before Testing the Layout

A centered room does not always need a centered tile. Sometimes the better visual result is centered on a grout joint. Sometimes a doorway, tub, vanity, stove, or focal wall should control the layout.
Schluter’s tile-layout guidance recommends dry-fitting tile courses and using layout lines to determine whether the installation should center on a tile or a grout joint. The purpose is to avoid awkward cuts and confirm the pattern before setting begins. See the Schluter layout example.
Dry-lay at least the critical runs
Test a row across the room in both directions using the planned spacers. Check what happens at:
- doorways
- the most visible wall
- cabinets and islands
- tubs and shower curbs
- thresholds
- floor registers
- columns or niches
If the dry layout leaves a tiny sliver at one edge, shift the reference line before installation. Do not rely on a rule that every edge piece must be “at least half a tile.” The best adjustment depends on the room and focal points.
Mistake #5: Measuring the Tile but Not the Installed Module
Nominal tile size is not always the same as actual measured size. A product sold as 12 × 24 inches may not measure exactly 12 × 24.
Open boxes and measure representative pieces before finalizing the layout. The installed module includes:
- actual tile dimensions
- grout-joint width
- pattern offset
- orientation
- trim or profile pieces
This matters especially with long planks, handmade-look tile, unrectified edges, natural stone, and patterns that depend on repeated modules.
Mistake #6: Ignoring the Substrate and Finished Floor Height
Accurate tile dimensions do not solve a substrate problem.
The TCNA Handbook requires the tile assembly to start with a properly designed, constructed and prepared substrate and includes current substrate-flatness guidance. See TCNA installation guidance.
Before ordering tile, account for the finished assembly height:
- subfloor or slab
- underlayment or membrane where required
- setting material
- tile thickness
- adjacent flooring
- thresholds and transitions
- door clearance
- appliance clearance
Do not use thin-set mortar as a general-purpose floor-leveling material unless the product and method specifically allow the application. Correct the substrate using the appropriate system.
Mistake #7: Forgetting Movement Joints and Perimeter Space
Tile assemblies need room for movement. Do not measure a tile field as though every edge should be packed hard against walls, cabinets, columns, or other restraining surfaces.
Current TCNA/ANSI installation guidance includes movement-joint requirements. Schluter’s layout example also shows perimeter space around the tile field. The exact joint design depends on the assembly and conditions. Follow the applicable tile-installation method and movement-joint standard for the project.
Grout is not a substitute for a required movement joint.
How to Measure a Tile Project Step by Step
- Sketch the space. Mark every wall, doorway, cabinet, fixture, niche, threshold and transition.
- Measure each dimension more than once. Note variation rather than hiding it in an average.
- Check square. Compare diagonals or establish perpendicular reference lines.
- Confirm the actual tile size. Measure representative pieces from the tile you plan to use.
- Choose the grout joint. Use product and installation guidance rather than a universal width.
- Dry-lay critical courses. Test what happens at the most visible edges and openings.
- Choose the starting/reference lines. Adjust to avoid visibly awkward cuts.
- Calculate area and box count. Use the actual box coverage.
- Add project-specific extra material. Base it on cuts, pattern, breakage risk and spare-tile needs.
- Recheck before ordering. Confirm lot availability, trim pieces, transitions and installation accessories.
Floor vs. Wall vs. Shower Measuring
Floor Tile
Floor projects need area, perimeter conditions, transitions, doorways, floor vents, fixed cabinets, islands and finished-floor height. Use the Floor Tile Buying Guide for material and room-use decisions.
Wall Tile
Wall projects need accurate width and height plus outlets, switches, shelves, windows, cabinets and corners. For backsplashes, map the countertop line and underside of upper cabinets before choosing the starting course. See the DIY Backsplash guide.
Shower Tile
Shower measurement must coordinate with the complete waterproofing and drainage system. Wall and floor tile quantities should be planned separately, and niche, bench, curb, drain and slope geometry can add cuts. See the Shower Tile Ideas guide.
Tile Measuring Tools That Are Actually Useful

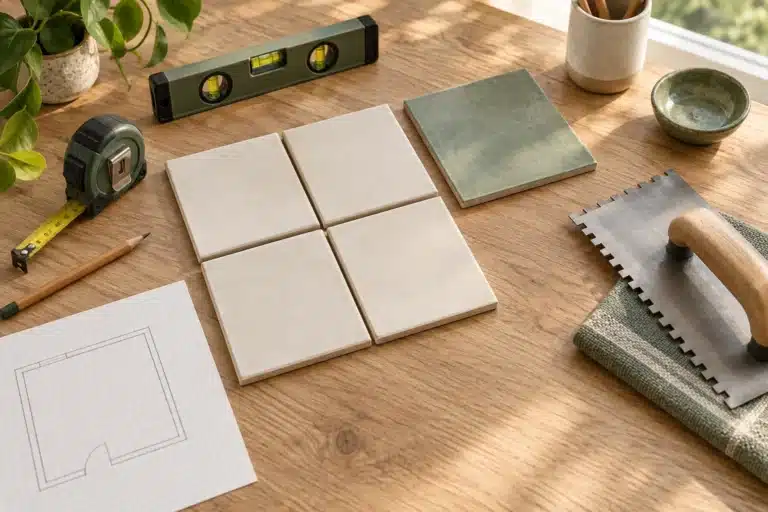
- Quality tape measure: for direct wall, floor and opening dimensions
- Laser measure: useful for larger spans and quick cross-checks
- Long level or laser level: for reference lines and checking walls/floors
- Framing square or large square: for layout checks
- Chalk line: for long floor reference lines
- Tile spacers: for testing the real installed module
- Notebook or digital plan: for keeping dimensions tied to the correct wall/zone
For a broader starter kit, see Must-Have DIY Home Tools.
Before You Order Tile
- Use the Tile Calculator for area, boxes, grout and material cost inputs.
- Use the Tile Layout Patterns planner to test pattern direction and complexity.
- Check Types of Tile before choosing the material.
- Compare current labor and prep factors in Tile Installation Cost in 2026.
- If you are deciding whether to install it yourself, read DIY or Hire a Tile Installer?.
- For product directions and installation tools, visit the Floor Tile Buying & Styling edit.
Tile Measuring Mistakes FAQs
How much extra tile should I buy?
There is no single percentage that fits every project. Extra material depends on room shape, tile size, layout, cuts, breakage risk, pattern matching and whether you want spare tile for future repairs. Plan the layout first, then calculate full boxes.
Should I subtract cabinets and fixtures from the tile area?
Only when those areas truly will not receive tile and the installation plan is settled. Small deductions can sometimes create more ordering risk than savings, especially when the layout needs full boxes and spare pieces.
How do I measure an L-shaped room?
Divide the room into rectangles, calculate each rectangle separately, then add the areas. Keep the actual layout continuous across the full space when planning reference lines.
What grout-joint width should I use?
Use the tile manufacturer, grout manufacturer and current installation guidance for the exact tile. Joint width must accommodate tile-size variation and the planned application.
Do I need to measure the actual tile?
Yes. Nominal dimensions may differ from the pieces in the box, and dimensional variation affects the installed module and grout-joint planning.
Should the tile layout always start in the center of the room?
No. Centering is a layout tool, not a universal rule. The better starting point may be controlled by a doorway, focal wall, tub, vanity, kitchen island, or another highly visible edge.
Can a laser measure replace a tape measure?
A laser measure is useful for cross-checking and longer spans, but keep a physical tape for tile, openings, small offsets, trim pieces, and final cut dimensions.